Qidi Tech 1 - Printer Upgrades
3D Printing - First Project
As I ended up getting myself a Qidi Tech 1 printer, I did go through and work on printing out some updates for the printer as some of the first projects that I went through. This first project I ended up going through is for some handle magnet mounts for the front and side plexiglass doors, which allows the doors to stay closed as they have small magnets that are glued into the actual parts. I have to say that they really ended up working out very well.
 |
 |
| 3D Printing Project 1: Figure 1 | 3D Printing Project 1: Figure 2 |
3D Printing - Second Project
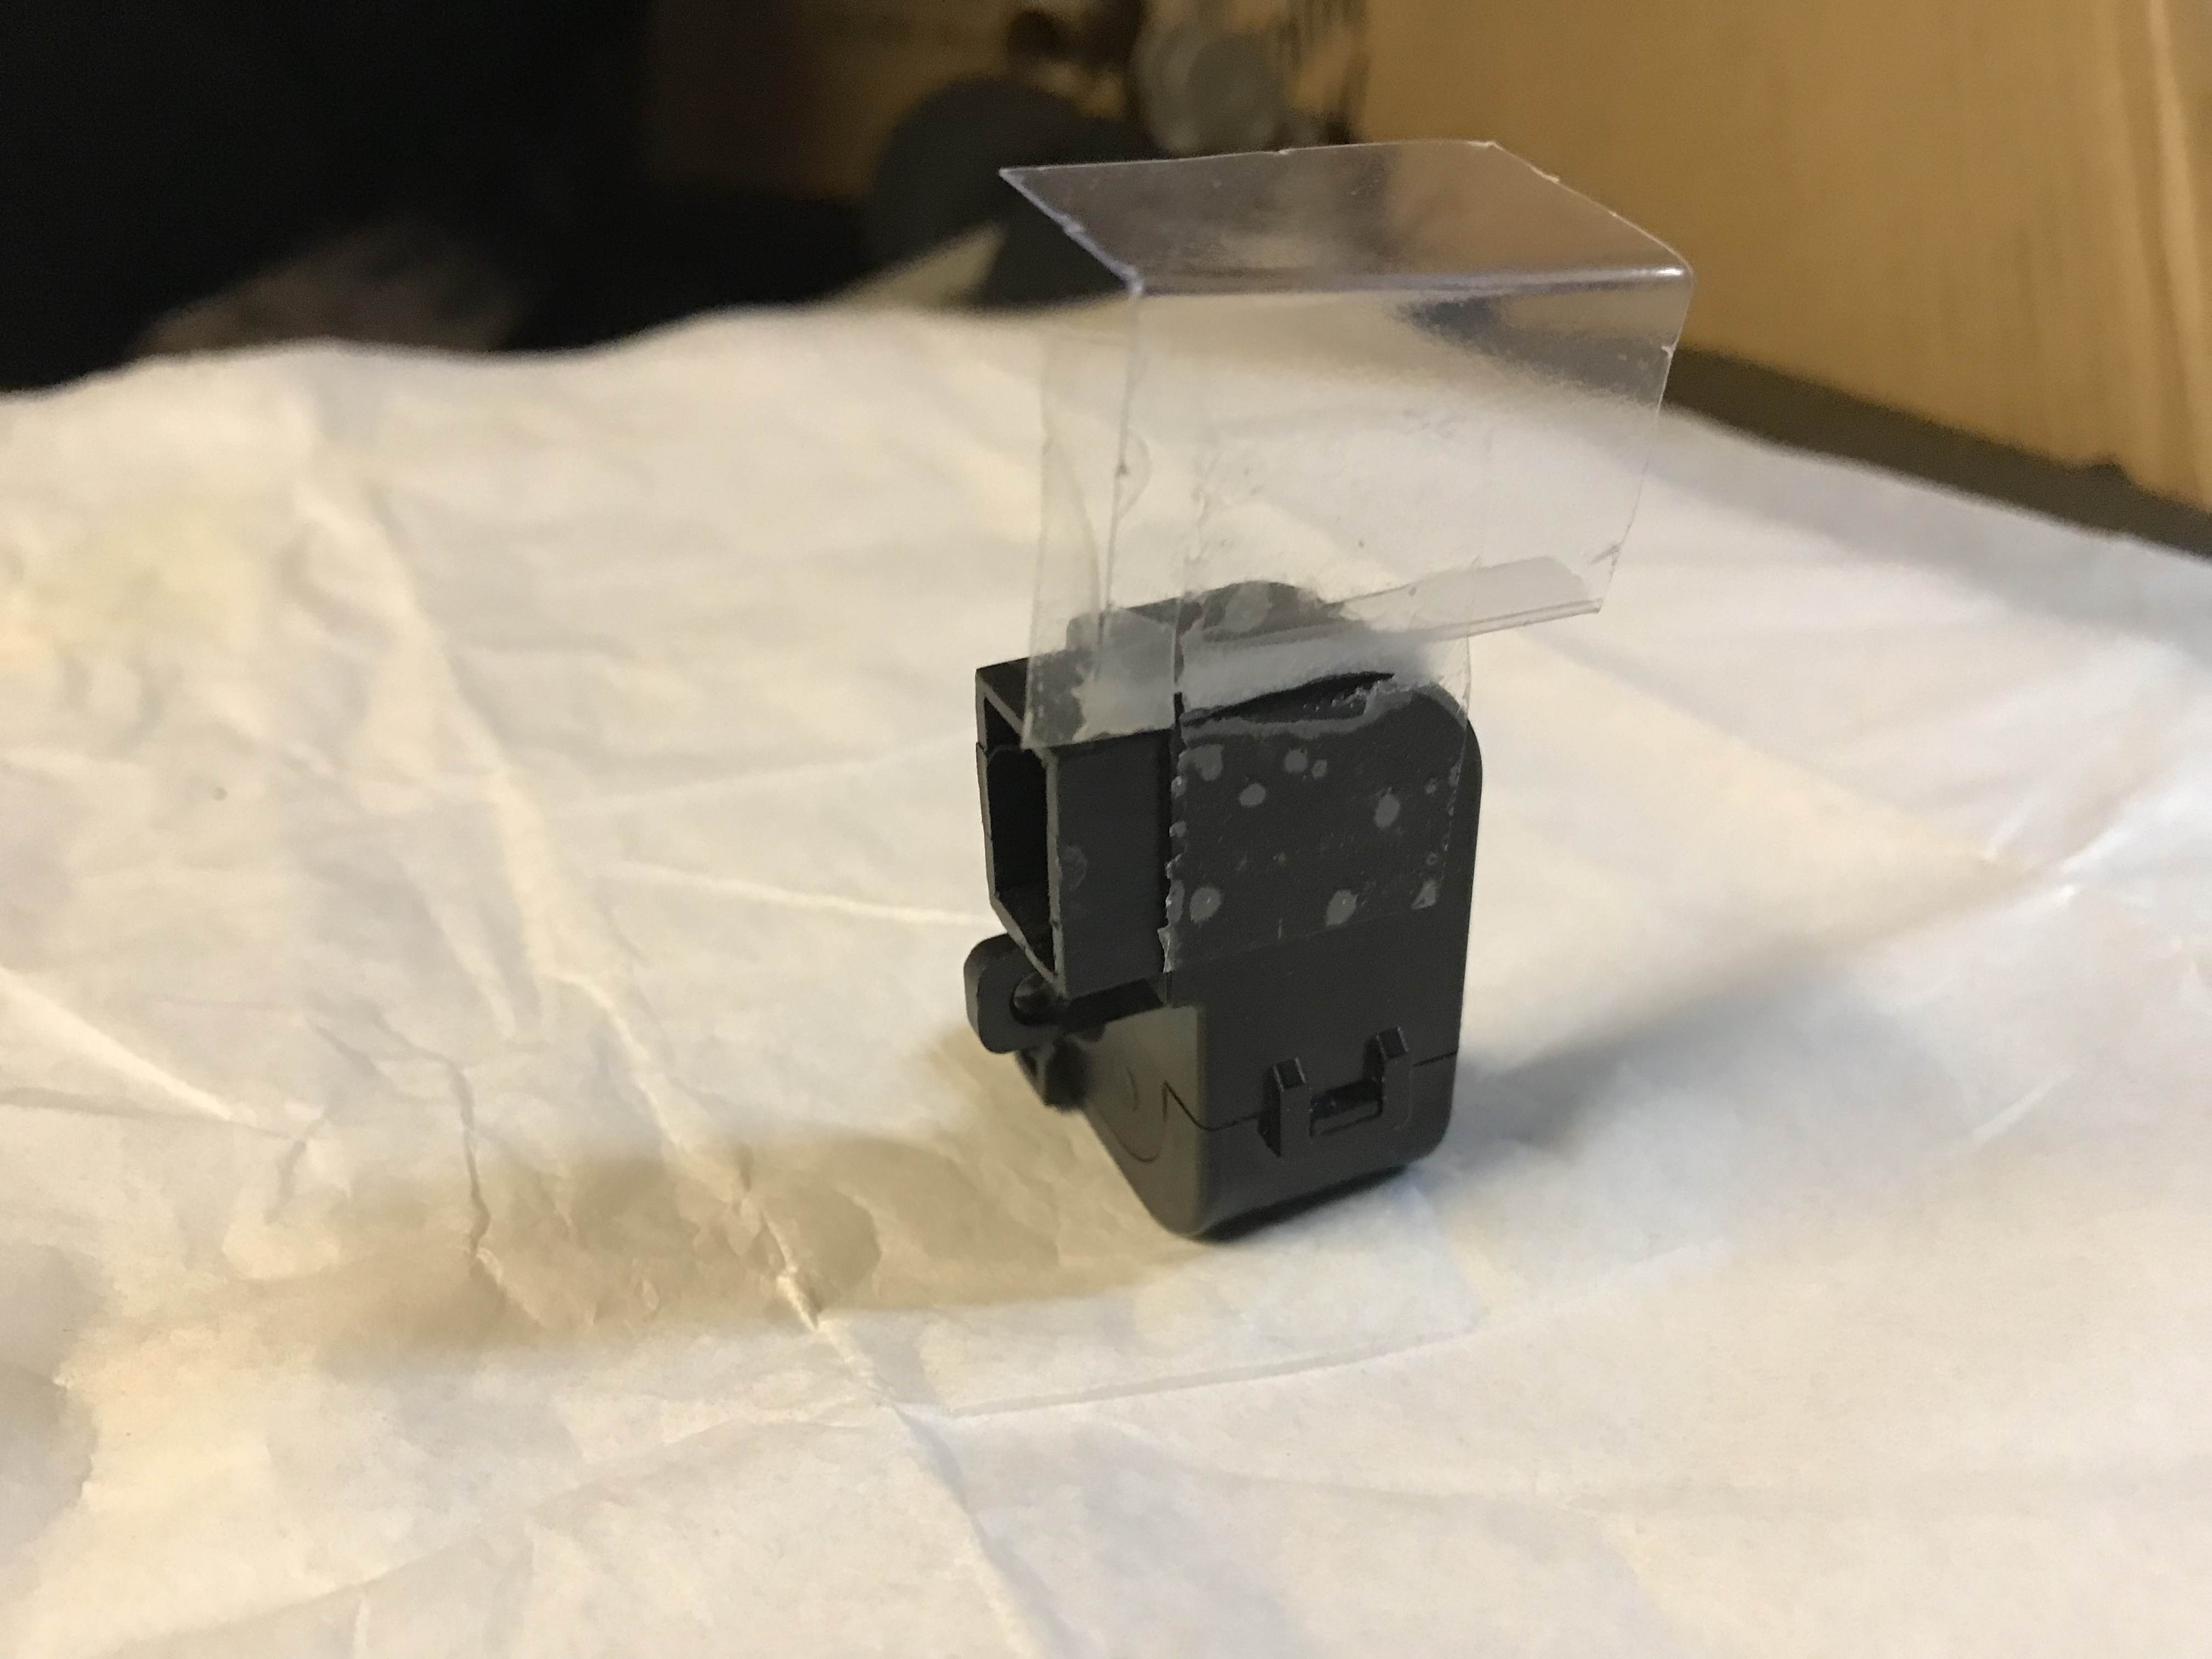
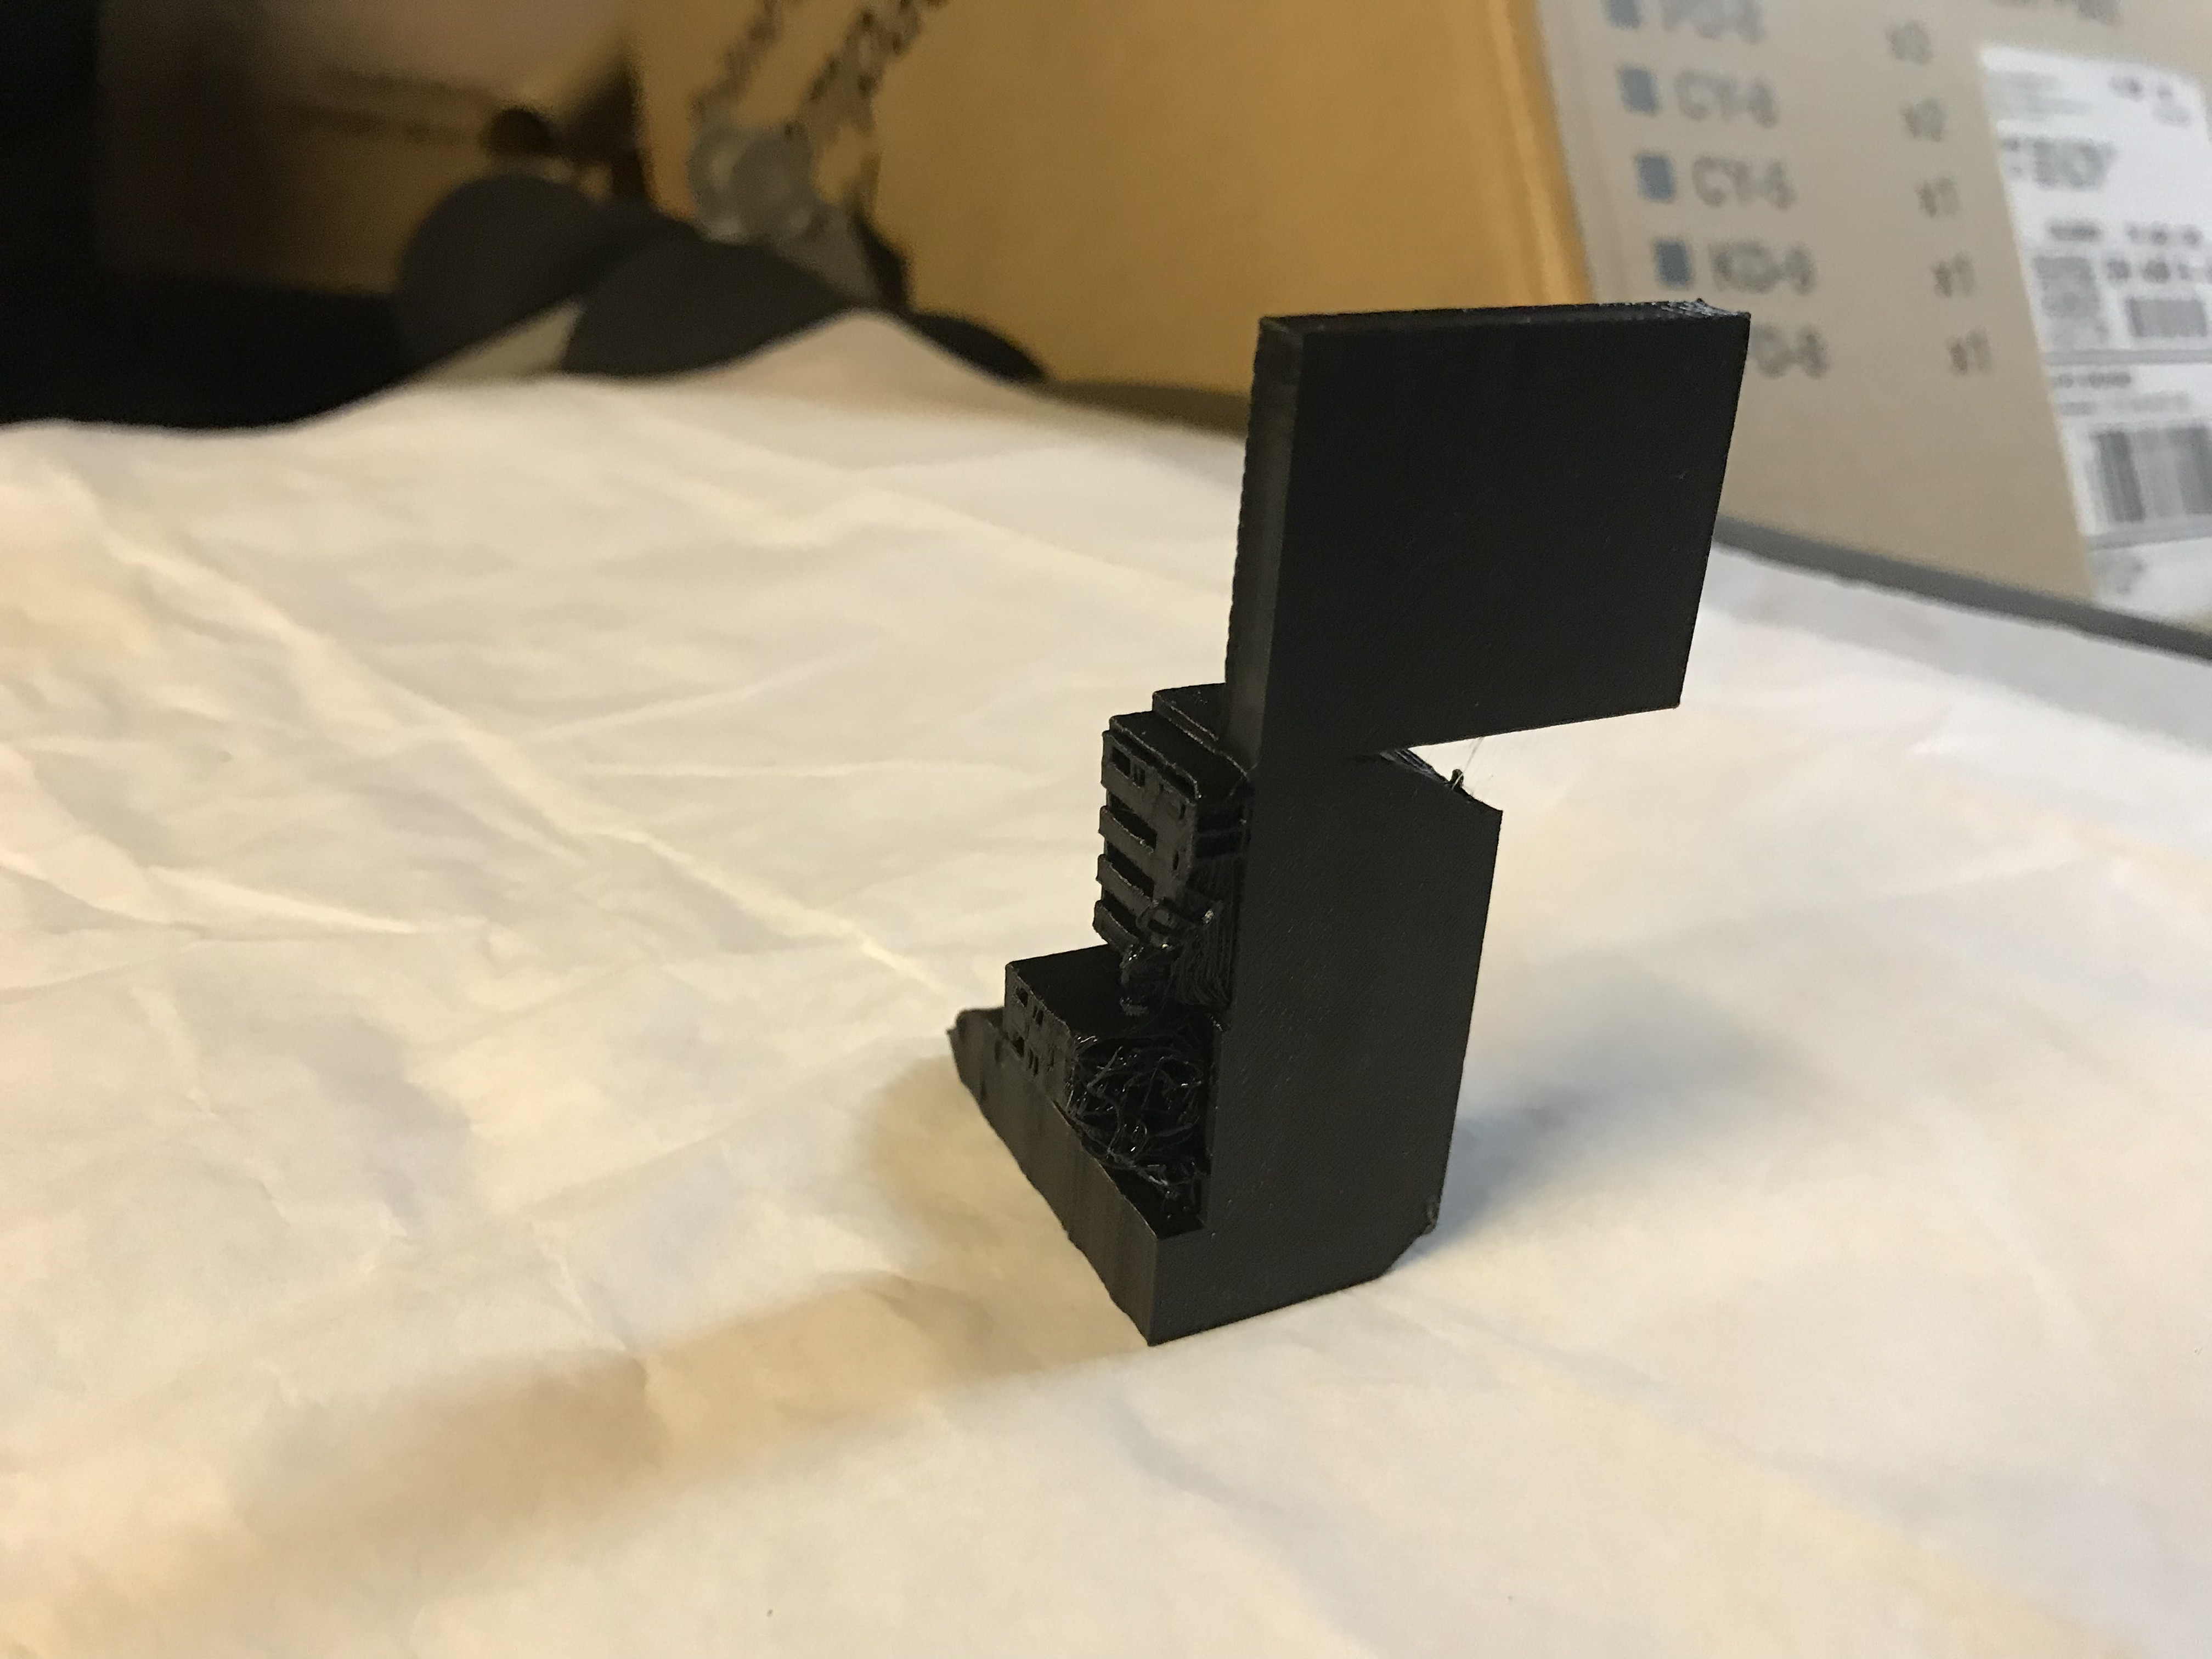
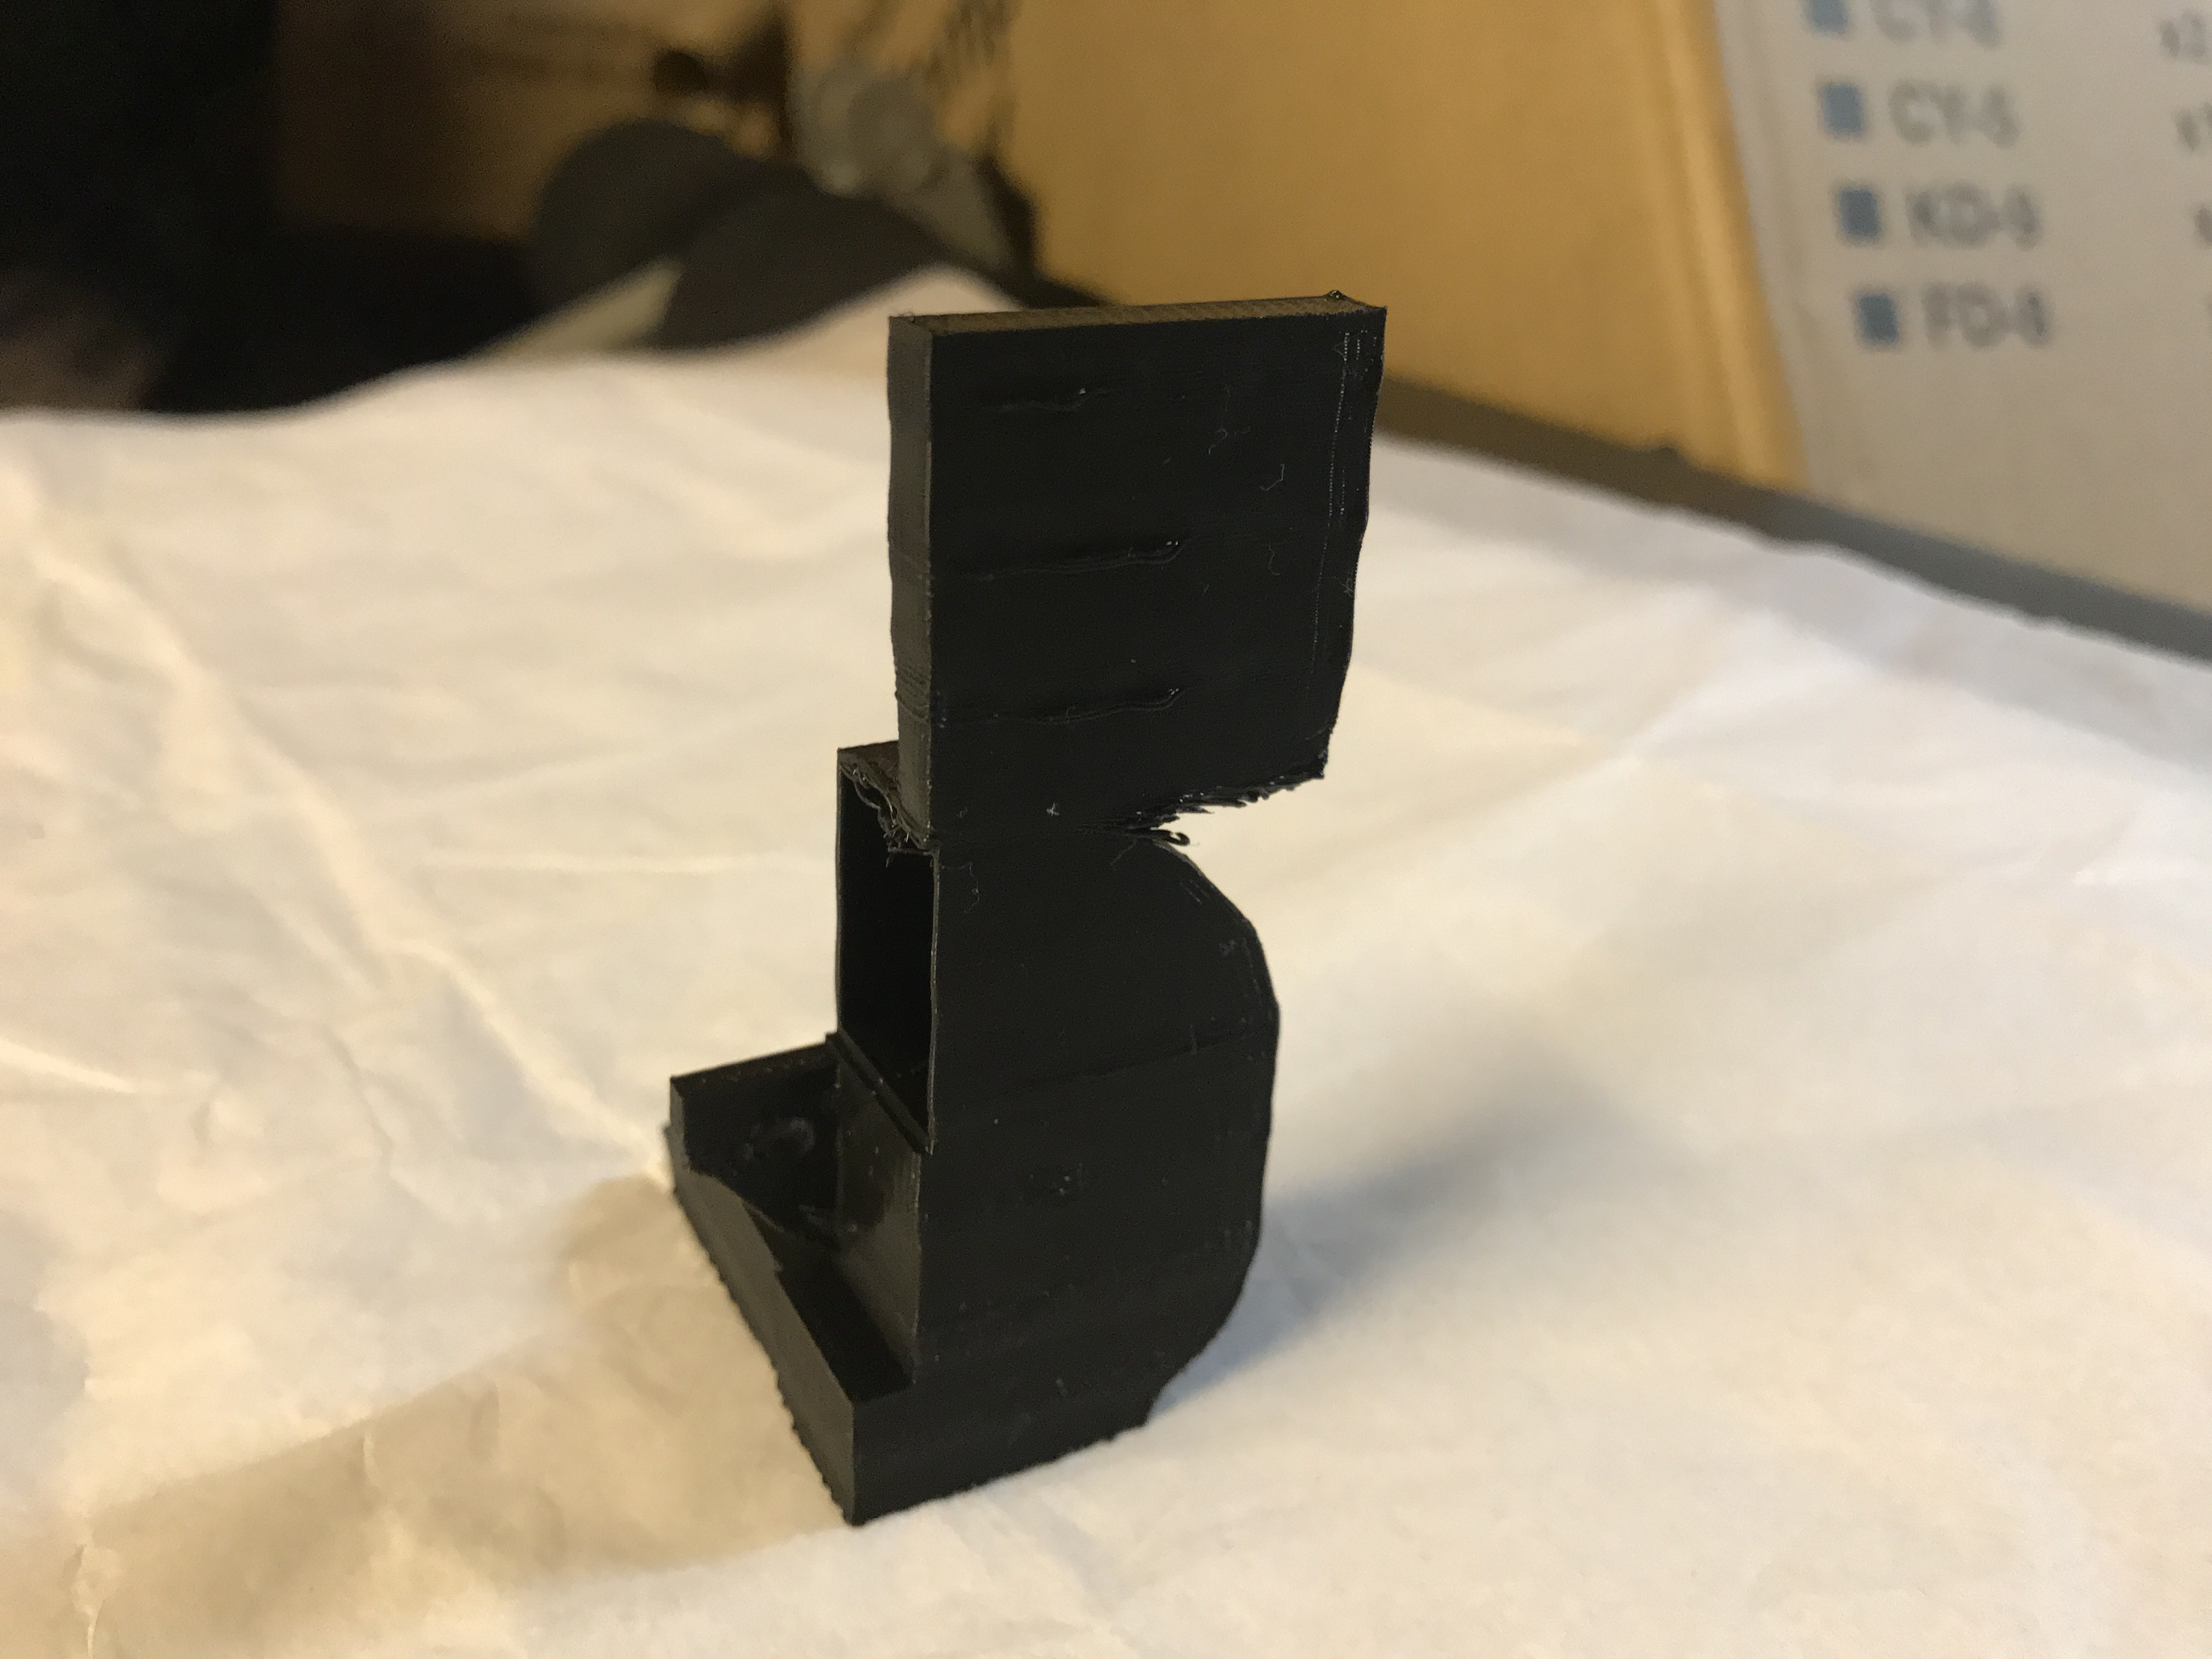
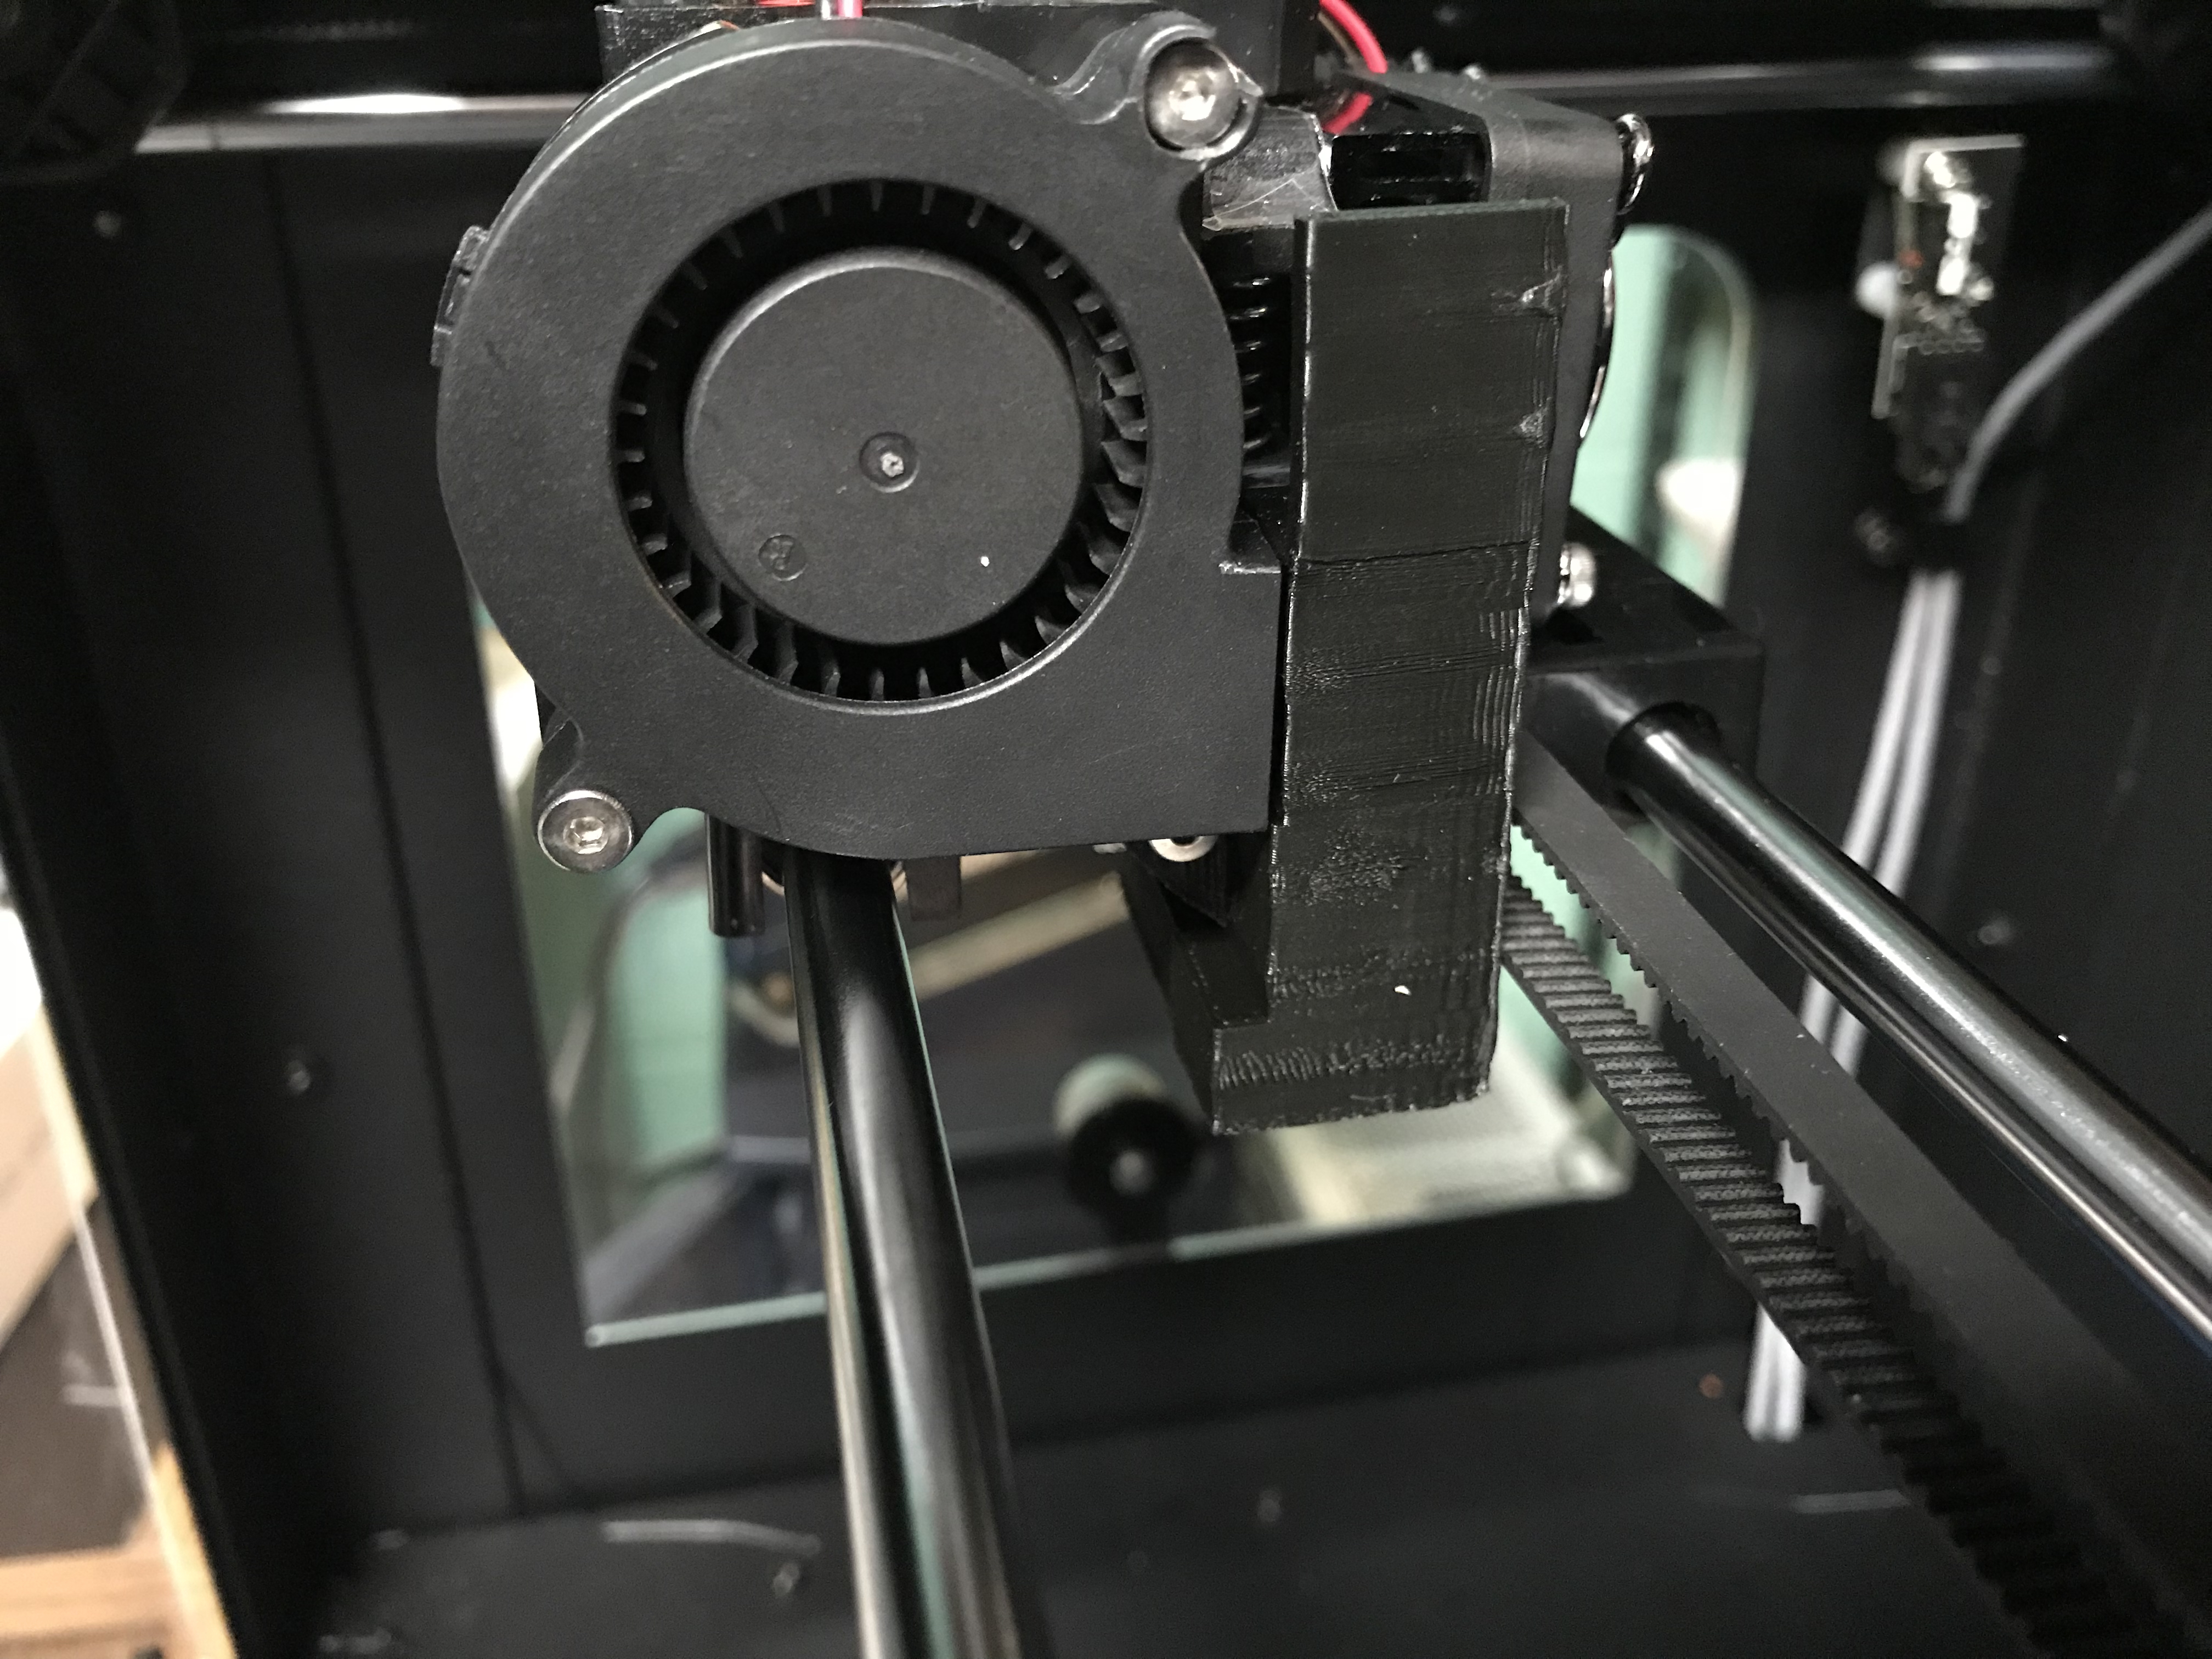
For my second 3D printer upgrade I choose to correct an issue with the duct fan that redirectst the airflow from a fan to the extruder. Originally when I put the printer together I found that a sensor on the side was not being triggered from the movement of the extruders. I was able to correct this originally by taping a piece of lexan plastic to the top of the duct fan (shown in figure 1). I then decided to re-create this duct fan with an additional piece on the top, which would trigger the sensor. My first few attempts (figures 2 through 4). After a fitting, I found that the width was a little wide as the edge hit the belt drive for the extruder movement. I narrowed the design and even reduced the size of the sensor activator (seen in figure 5), which has been installed in the printer as seen in figure 6. Whenever I was printing in the past, I had to re-position and re-tape the sensor actuator, but now everything is working perfectly.
 |
 |
| 3D Printing Project 2: Figure 1 | 3D Printing Project 2: Figure 2 |
 |
 |
| 3D Printing Project 2: Figure 3 | 3D Printing Project 2: Figure 4 |
 |
 |
| 3D Printing Project 2: Figure 5 | 3D Printing Project 2: Figure 6 |
3D Printing - Third Project
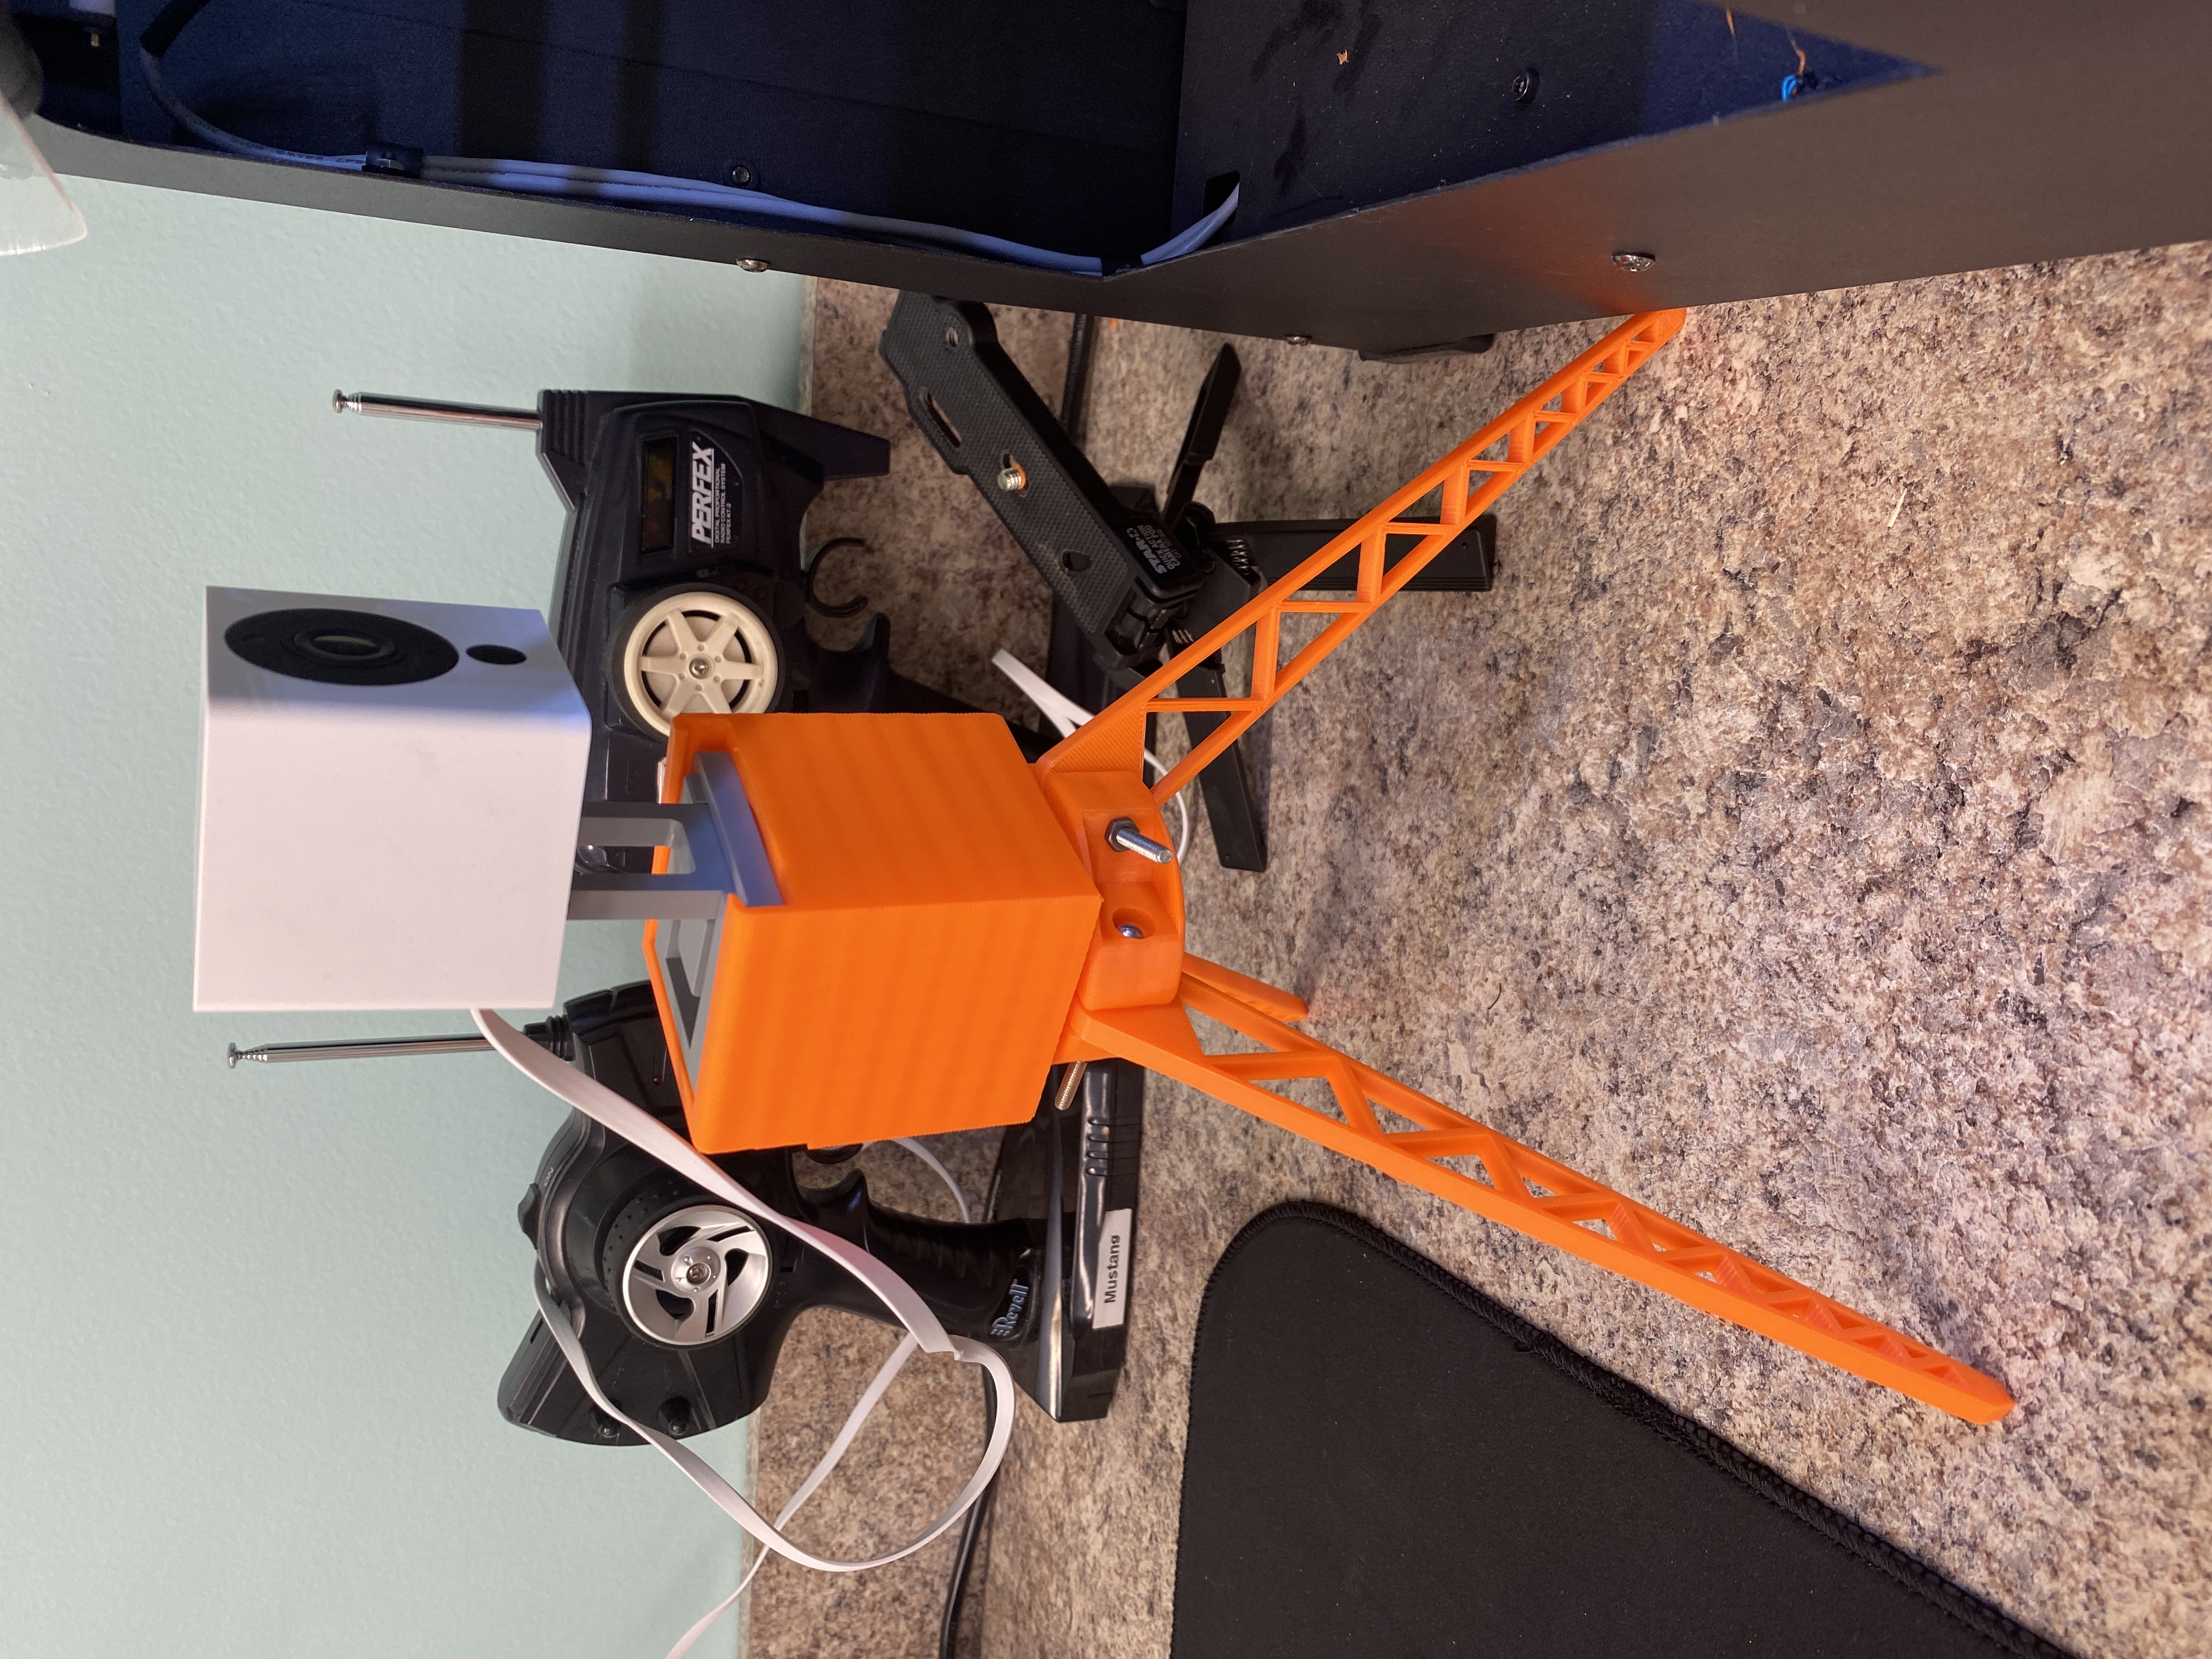
For my third 3D printer upgrade, I ended up buying a WYZE Video Camera from Amazon. I did want to have the camera view the build platform of my 3D printer, so that I can monitor my 3D prints while I am not physicall there. My original design started by going to Thingiverse and printed out a tripod mount for the camera, which you can see in Figure 1, but found that with using an old table tripod that I have had for years, was too short and did not allow me to see the build plate. I then went back to Thingiverse and downloaded a tripod, which I printed out. I then re-designed the original Tripod mount for the WYZE camera to include a socket on the bottom. I am hoping to use the tripod for other uses, so having this inter-changable option is a big advantage.
 |
 |
| 3D Printing Upgrade 3: Figure 1 | 3D Printing Upgrade 3: Figure 2 |